When I first began experimenting with DIY face masks for clear skin using simple kitchen ingredients, I was skeptical. My grandmother’s age-old Indian skincare remedies seemed too basic to be effective. But after years of trying expensive commercial products that only irritated my sensitive skin, I turned to the natural recipes passed down through generations. The results were transformative—my complexion is now clearer than ever, and I’ve saved over $2,000 by skipping store-bought treatments in favor of these gentle, homemade solutions.
My transformation began when my skin was at its worst – dealing with hormonal acne, uneven texture, and persistent dark spots that refused to fade despite using costly treatments. Frustrated and desperate, I called my grandmother in Mumbai, who laughed and said, “Beta, everything you need is already in your kitchen.” That conversation changed my entire approach to skincare and introduced me to the incredible power of traditional Indian beauty secrets.
My Cultural Heritage: The Foundation of Kitchen Skincare
Growing Up with Ayurvedic Beauty Traditions
I grew up watching my mother and aunts prepare face masks using ingredients from our kitchen pantry. However, like many second-generation immigrants, I initially dismissed these practices as outdated. Instead, I chased Western skincare trends and spent hundreds of dollars on products promising miraculous results.
The turning point came during a family visit to India, where I witnessed my 65-year-old grandmother’s flawless, radiant skin. When I asked about her skincare routine, she simply pointed to her kitchen and said, “This is my beauty salon.” That moment sparked my deep dive into traditional Indian skincare practices and changed my relationship with natural beauty forever.
Understanding Ayurvedic Skin Principles
Ayurveda categorizes skin into three doshas: Vata (dry), Pitta (sensitive/oily), and Kapha (combination). Through consultation with an Ayurvedic practitioner and extensive self-observation, I identified my skin as primarily Pitta with Kapha tendencies, which explained my oily T-zone and sensitivity to harsh ingredients.

This understanding revolutionized my approach to DIY skincare, as I learned to customize ingredients based on my skin’s specific needs rather than following generic recipes.
My Top 15 Kitchen Ingredient Face Masks
For Acne-Prone and Oily Skin
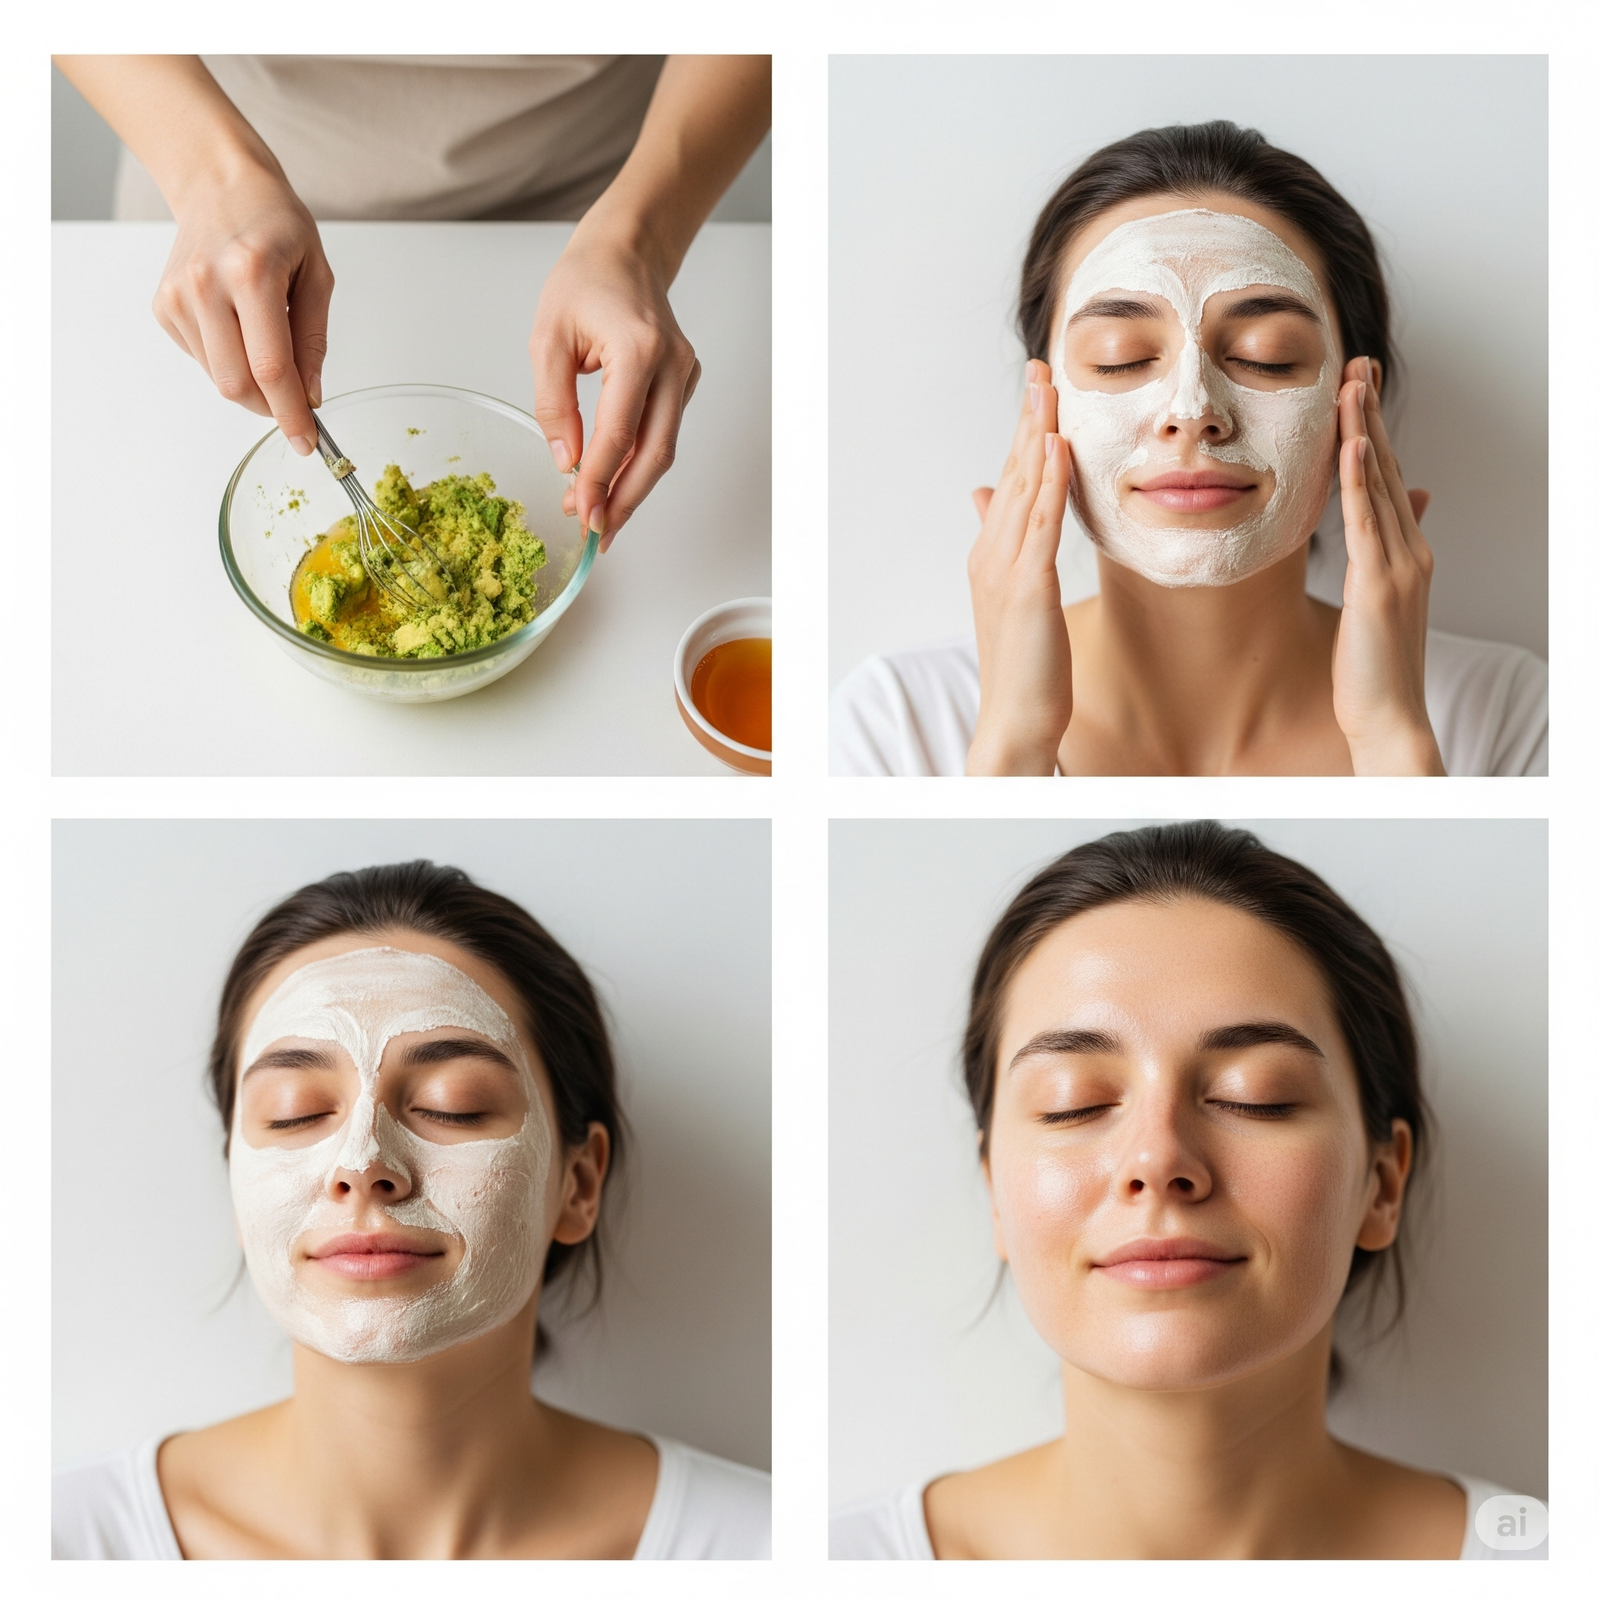
1. The Turmeric-Besan Power Mask (My Holy Grail)
This combination has been my go-to mask for over two years, and I use it twice weekly without fail. Turmeric’s anti-inflammatory properties combined with chickpea flour’s gentle exfoliation have dramatically reduced my breakouts.
Ingredients:
- 2 tablespoons besan (chickpea flour)
- 1/2 teaspoon turmeric powder
- 2 tablespoons plain yogurt
- 1 teaspoon honey
My Method: I mix these ingredients into a smooth paste and apply it to clean skin, avoiding the eye area. After 15-20 minutes, I gently massage in circular motions before rinsing with lukewarm water. The immediate glow and long-term acne reduction have made this mask indispensable to my routine.
Amazon Affiliate : [ organic turmeric powder, chickpea flour, or raw honey]
2. Neem and Multani Mitti Detox Mask
When my skin needs deep cleansing, particularly after traveling or during hormonal fluctuations, this mask works wonders. Neem’s antibacterial properties combined with Fuller’s earth create a powerful detoxifying treatment.
Ingredients:
- 10-12 fresh neem leaves (or 1 tsp neem powder)
- 2 tablespoons multani mitti (Fuller’s earth)
- Rose water to mix
I grind fresh neem leaves with a little water to create a paste, then mix with Multani mitti and enough rose water to achieve the right consistency. This mask draws out impurities and leaves my skin feeling incredibly clean and refreshed.
For Brightening and Hyperpigmentation
3. Potato and Lemon Brightening Mask
After dealing with stubborn dark spots from previous breakouts, I discovered this simple yet effective combination. Potato contains vitamin C and mild bleaching properties, while lemon provides additional brightening benefits.
Ingredients:
- 1 medium potato, grated
- 1 tablespoon fresh lemon juice
- 1 teaspoon honey
I grate the potato finely and mix it with lemon juice and honey. Applied for 20 minutes, this mask has visibly faded my dark spots over consistent use for three months.
4. Tomato and Oatmeal Exfoliating Mask
Tomatoes contain lycopene and natural acids that help brighten skin, while oatmeal provides gentle physical exfoliation. I use this mask when my skin appears dull and needs revitalization.
Ingredients:
- 1 ripe tomato, pureed
- 2 tablespoons finely ground oats
- 1 teaspoon rose water
This combination not only brightens but also improves skin texture through gentle exfoliation. I’ve noticed a significant improvement in my skin’s radiance after incorporating this mask monthly.
For Hydration and Anti-Aging
5. Avocado and Honey Nourishing Mask
During winter months or when my skin feels particularly dry, this deeply nourishing mask provides intense hydration without clogging pores.
Ingredients:
- 1/2 ripe avocado, mashed
- 1 tablespoon raw honey
- 1 teaspoon almond oil
The healthy fats in avocado combined with honey’s humectant properties create a luxurious treatment that leaves my skin soft and plump. I use this mask whenever my skin needs extra nourishment.
6. Banana and Milk Cream Hydrating Mask
This gentle, creamy mask works wonderfully for sensitive skin days when I need hydration without any active ingredients that might irritate.
Ingredients:
- 1 ripe banana, mashed
- 2 tablespoons full-fat milk
- 1 teaspoon honey
The natural enzymes in banana combined with lactic acid from milk provide gentle exfoliation while deeply hydrating the skin.
Advanced Indian Skincare Combinations
Traditional Ayurvedic Formulations
7. Sandalwood and Rose Water Classic
Sandalwood has been used in Indian skincare for centuries due to its cooling and anti-inflammatory properties. I use this mask when my skin feels irritated or inflamed.
Ingredients:
- 2 tablespoons sandalwood powder
- Rose water to mix
- 1 teaspoon honey (optional)
This traditional combination soothes irritated skin and provides a natural glow that’s been cherished in Indian culture for millennia.
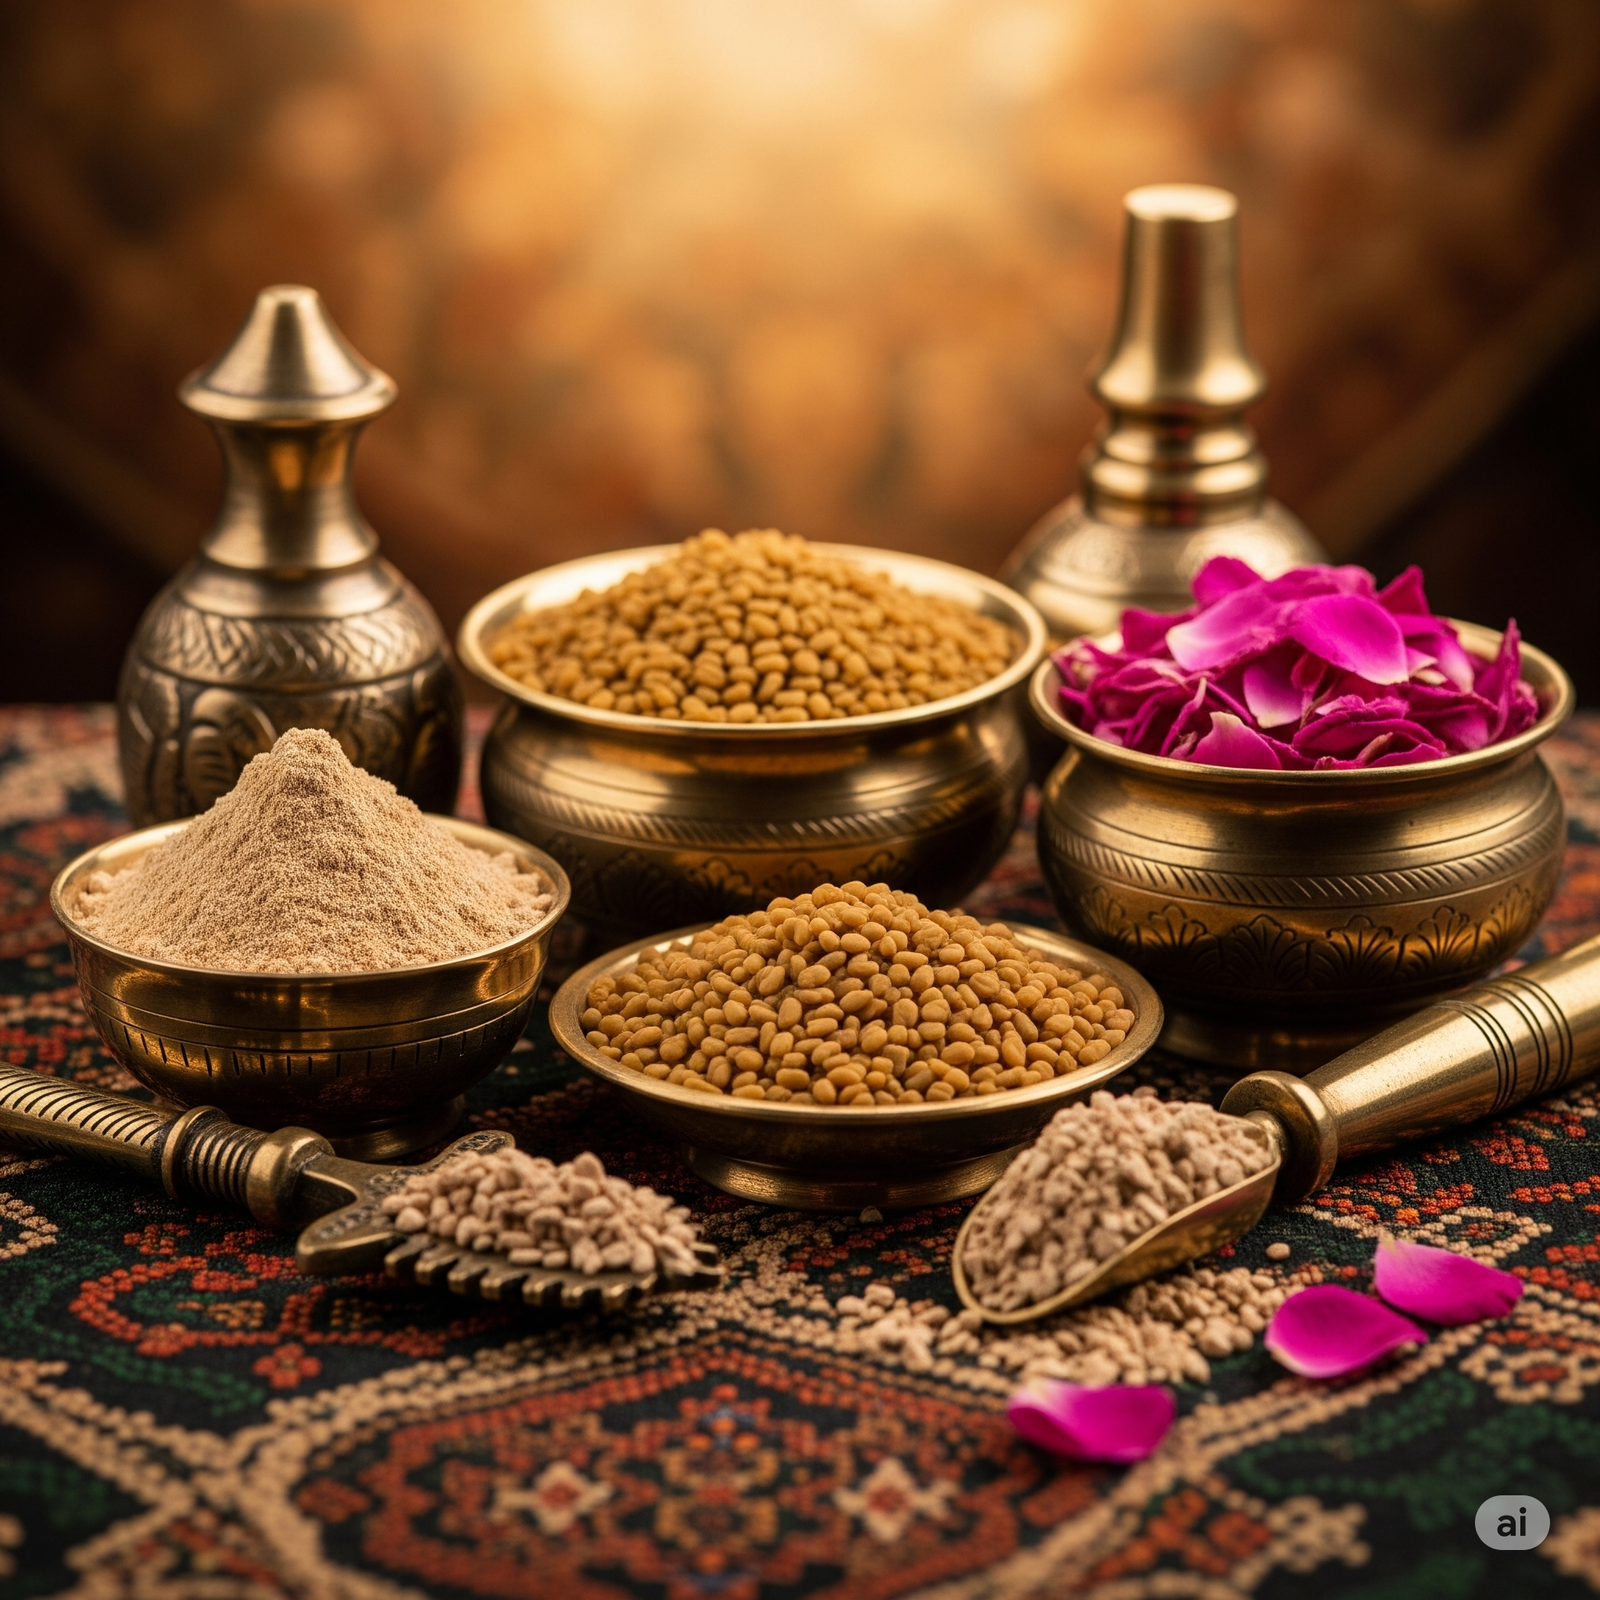
8. Fenugreek Seed Anti-Aging Mask
After learning about fenugreek’s anti-aging properties from my grandmother, I incorporated this mask into my monthly routine. The seeds contain compounds that help firm and tighten skin.
Ingredients:
- 2 tablespoons fenugreek seeds, soaked overnight and ground
- 1 tablespoon yogurt
- 1 teaspoon honey
The preparation requires planning, but the results justify the effort. This mask has helped improve my skin’s firmness and overall texture.
Modern Adaptations of Ancient Recipes
9. Green Tea and Rice Flour Antioxidant Mask
Combining modern knowledge of antioxidants with traditional rice flour usage, this mask provides both anti-aging benefits and gentle exfoliation.
Ingredients:
- 2 tablespoons rice flour
- 2 tablespoons cooled green tea
- 1 teaspoon honey
Green tea’s antioxidants combined with rice flour’s gentle exfoliating properties create a mask that addresses multiple skin concerns simultaneously.
10. Papaya and Yogurt Enzyme Mask
Papaya contains natural enzymes that gently dissolve dead skin cells, while yogurt provides probiotics and lactic acid for skin health.
Ingredients:
- 1/4 cup ripe papaya, mashed
- 2 tablespoons plain yogurt
- 1 teaspoon honey
This enzyme-rich mask has improved my skin texture significantly and provides a natural glow that lasts for days.
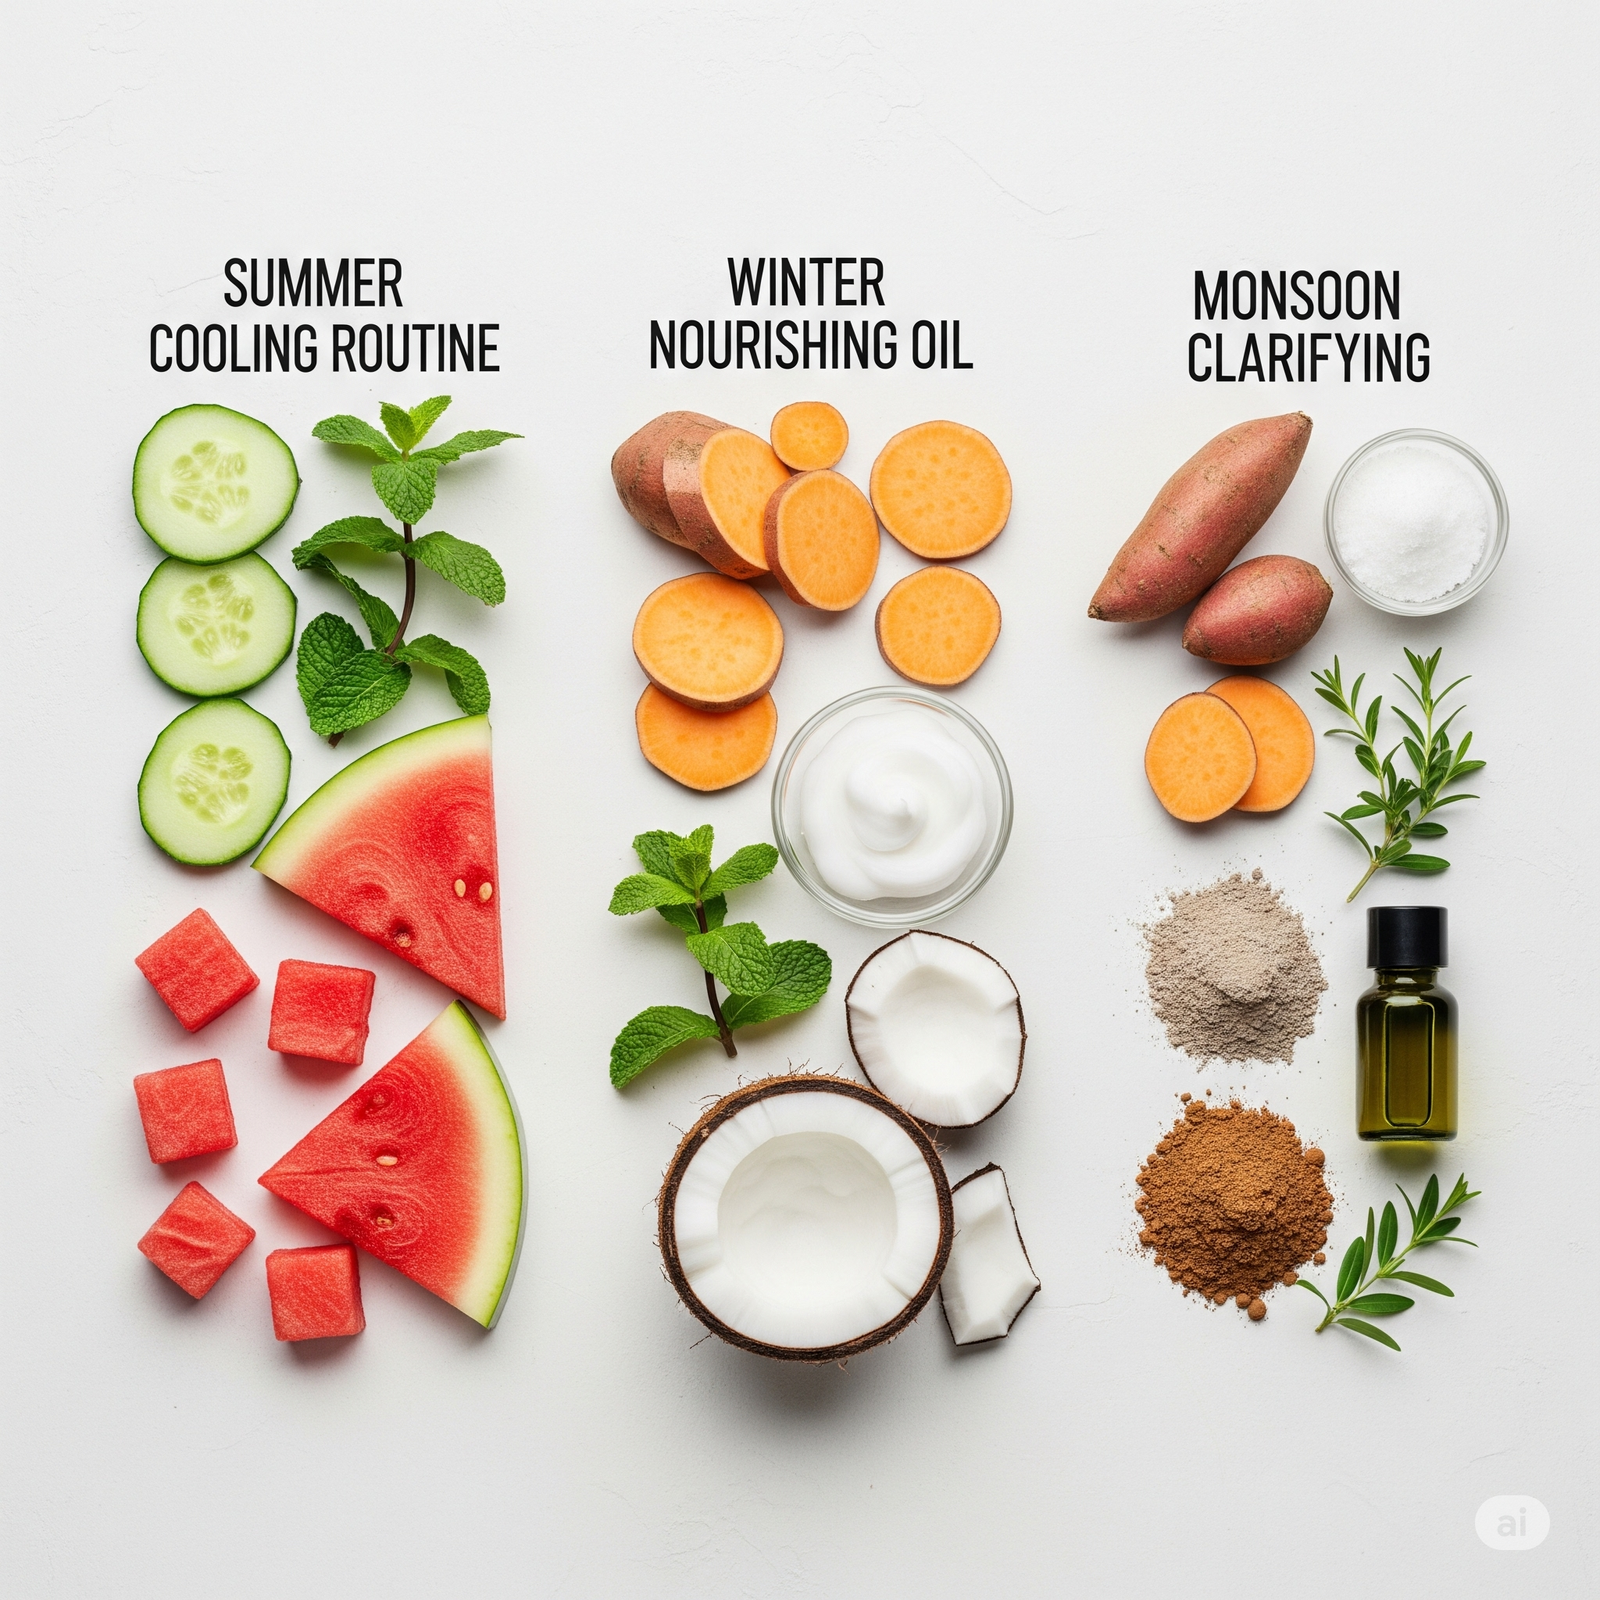
Seasonal Skincare Adaptations
| Season | Mask Name | Ingredients | Benefits |
|---|---|---|---|
| ☀️ Summer | Cucumber & Mint Cooling Mask | – ½ cucumber (grated)- 6–8 mint leaves (crushed)- 1 tbsp aloe vera gel | Instantly soothes sun-irritated skin and hydrates during intense heat |
| Watermelon & Honey Hydrating Mask | – ¼ cup watermelon (mashed)- 1 tbsp honey- 1 tsp rose water | Boosts hydration with fruit acids and refreshes tired skin | |
| ❄️ Winter | Sweet Potato & Coconut Oil Mask | – ½ cooked sweet potato (mashed)- 1 tbsp coconut oil- 1 tsp honey | Deeply nourishes dry, flaky skin with vitamins and moisture |
| 🌧️ Monsoon | Clay & Tea Tree Oil Purifying Mask | – 2 tbsp bentonite clay- 2–3 drops tea tree oil- Water or rose water to mix | Fights humidity-induced breakouts and clarifies oily skin |
This combination effectively manages excess oil production while preventing monsoon-related breakouts.
My Weekly Skincare Routine Integration
Monday to Sunday Schedule
I’ve developed a systematic approach to incorporating these DIY masks into my weekly routine, ensuring my skin receives consistent care without overwhelming it with too many treatments.
Monday: Turmeric-besan mask (my staple) Wednesday: Seasonal mask based on current needs Friday: Hydrating or anti-aging mask depending on skin condition Sunday: Deep cleansing or detox mask
This schedule allows my skin to benefit from various ingredients while maintaining consistency in treatment frequency.
Preparation and Storage Tips
I prepare mask ingredients in small batches and store certain dry mixes in airtight containers for convenience. For instance, I premix turmeric and besan in larger quantities, storing the blend for up to three months.
Fresh ingredients like fruits and vegetables are always prepared immediately before use to maintain their potency and prevent bacterial growth.
Common Mistakes I Made (And How to Avoid Them)
Over-Exfoliation Errors
Initially, I made the mistake of using exfoliating masks too frequently, thinking more would mean better results. This led to irritated, over-sensitized skin that took weeks to recover.
I learned that gentle, consistent treatment yields better results than aggressive, frequent applications. Now I limit physical exfoliation to once or twice weekly maximum.
Patch Testing Oversights
My enthusiasm for trying new ingredient combinations led to several allergic reactions that could have been avoided with proper patch testing. I now test every new combination on a small area of my inner arm 24 hours before facial application.
Ingredient Quality Mistakes
Using poor-quality or chemically treated ingredients significantly impacted my results. I invested in organic, high-quality ingredients and noticed immediate improvements in mask effectiveness.
User Questions from Online Communities
Reddit’s r/IndianSkincareAddicts Insights
How do you deal with turmeric staining?
This common concern led me to discover that mixing turmeric with milk or yogurt significantly reduces staining. Additionally, I use only small amounts (1/4 teaspoon maximum) and cleanse thoroughly with oil-based cleansers.
Can kitchen ingredients replace commercial products entirely?
While my DIY routine handles most of my skincare needs, I still use a gentle cleanser and sunscreen daily. Kitchen ingredients excel at treatment and maintenance, but certain products remain necessary for comprehensive skincare.
How long before seeing results from DIY masks?
My experience shows immediate effects like smoother texture and glow, but significant improvements in acne, pigmentation, and overall skin health typically become apparent after 4-6 weeks of consistent use.
Quora’s Natural Skincare Discussions
Are DIY masks safe for sensitive skin?
As someone with sensitive skin, I’ve learned that natural doesn’t always mean gentle. Ingredients like lemon and certain essential oils can irritate sensitive skin. I always dilute acidic ingredients and perform patch tests.
What’s the science behind these traditional ingredients?
My research into the scientific basis of traditional ingredients revealed impressive evidence supporting their effectiveness. Turmeric contains curcumin with proven anti-inflammatory properties, while besan provides gentle physical and chemical exfoliation through its protein content.

Safety Considerations and Contraindications
Allergic Reactions and Sensitivities
Through personal experience and community feedback, I’ve identified common allergens in kitchen skincare ingredients. Citrus fruits, certain essential oils, and even seemingly gentle ingredients like honey can cause reactions in sensitive individuals.
I maintain a detailed journal documenting my skin’s reactions to different ingredients, which has helped me identify patterns and avoid problematic combinations.
Sun Sensitivity Warnings
Some ingredients, particularly citrus-based masks, can increase photosensitivity. I always use these treatments in the evening and ensure proper sun protection the following day.
The Economics of DIY Skincare
Cost Comparison Analysis
My detailed cost tracking over three years reveals significant savings compared to commercial skincare products:
| Treatment Type | DIY Cost per Month | Commercial Equivalent | Monthly Savings |
|---|---|---|---|
| Basic Cleansing Masks | $8 | $45 | $37 |
| Hydrating Treatments | $12 | $60 | $48 |
| Anti-aging Masks | $15 | $80 | $65 |
| Brightening Treatments | $10 | $55 | $45 |
Total Annual Savings: $2,340
Quality vs. Cost Benefits
Beyond monetary savings, DIY masks offer fresher, more potent ingredients without preservatives, artificial fragrances, or harsh chemicals that often irritate my sensitive skin.
Building Your DIY Skincare Kit
Essential Base Ingredients
Based on my experience, these ingredients provide the foundation for addressing most skin concerns:
Dry Ingredients: Turmeric, besan, oats, rice flour, Multani mitti Fresh Ingredients: Honey, yogurt, lemons, seasonal fruits Oils: Coconut oil, almond oil, rose water.
Storage and Organization Tips
I store dry ingredients in airtight glass containers labeled with purchase dates. Fresh ingredients are bought weekly to ensure potency and safety.
Cultural Significance and Modern Adaptation
Preserving Traditional Knowledge
My journey with DIY skincare has deepened my appreciation for traditional Indian beauty wisdom. These practices represent generations of accumulated knowledge about natural ingredients and their effects on skin health.
Sharing this knowledge with friends and online communities helps preserve these traditions while adapting them for modern lifestyles and concerns.
Bridging Generations
Teaching my teenage niece these traditional recipes has created a beautiful bridge between generations, allowing her to benefit from ancestral wisdom while developing healthy skincare habits early in life.
Troubleshooting Common Issues
Texture and Consistency Problems
Achieving the right mask consistency requires practice and attention to ingredient proportions. I’ve learned to adjust liquid content based on humidity, temperature, and ingredient freshness.
Application and Removal Techniques
Proper application and removal significantly impact mask effectiveness. I use clean brushes for even application and remove masks with lukewarm water and gentle circular motions.
Timing and Frequency Optimization
Finding the optimal timing and frequency for different masks required months of experimentation. I now customize timing based on skin condition, weather, and individual ingredient properties.
FAQs
How often should I use DIY face masks for clear skin?
Based on my experience, 2-3 times per week works best for most skin types. I use gentle masks more frequently and active ingredient masks less often to avoid over-treatment and irritation.
Can I store leftover DIY face mask mixture?
Fresh ingredients should be used immediately for safety and potency. However, I premix dry ingredients and store them in airtight containers for up to 3 months, adding fresh components when ready to use.
Which kitchen ingredients work best for acne-prone skin?
Turmeric, neem, besan, and tea tree oil have been most effective for my acne-prone areas. These ingredients provide antibacterial and anti-inflammatory benefits without over-drying the skin.
Conclusion: Embracing Kitchen Wisdom for Clear, Healthy Skin
Over the past three years, my journey with DIY face masks for clear skin—crafted from simple kitchen ingredients—has completely transformed both my complexion and my approach to self-care. What started as a last-ditch effort to calm stubborn breakouts gradually turned into a meaningful ritual rooted in natural remedies and traditional beauty wisdom.
The transformation has been incredible: fewer breakouts, smoother texture, brighter skin, and the joy of using clean, affordable ingredients. Beyond the visible results, these homemade masks have reconnected me with my cultural heritage and offered a skincare solution that’s not only effective but also gentle and empowering.
Traditional Indian skincare practices offer time-tested solutions that modern science increasingly validates. The anti-inflammatory properties of turmeric, the gentle exfoliation of besan, and the nourishing qualities of natural oils provide comprehensive skincare benefits without harsh chemicals or artificial additives.
Furthermore, the customization possibilities with kitchen ingredients allow for personalized treatments that address specific skin concerns and adapt to changing needs throughout seasons and life stages.
My advice for anyone beginning this journey is to start slowly, perform patch tests, and maintain realistic expectations. Consistency matters more than perfection, and gradual improvements often prove more sustainable than dramatic overnight changes.
The beauty of kitchen skincare lies not just in its effectiveness but in its accessibility, sustainability, and connection to generations of wisdom. By embracing these natural approaches, we honor traditional knowledge while creating effective, economical skincare routines that truly work.
As I continue refining my DIY skincare practice, I’m constantly amazed by the power of simple, natural ingredients to address complex skin concerns. This journey has taught me that sometimes the most effective solutions have been sitting in our kitchens all along, waiting to be rediscovered and appreciated.

